Finds washing is a crucial part of archaeological excavation, and although it may seem commonsense, there are many things which set apart a good ‘pot-washer’.
Equipment – per person, per ½ day
- 2 washing up bowls
- 2 newspapers
- 1 toothbrush (or several of different hardnesses)
- 1 wooden (not metal) kebab skewer
- 1 small cellulose sponge (Spontex 2 thick moppets)
- 4 finds trays (or similar)
- c.10 finds (Tyvek) labels
- c.10 finds bags of various sizes
Health and Safety
- Some artefacts have sharp edges, so do take care.
- Wear gloves if you have any open cuts or sores on your hands or if you have any allergies to elements in soil, or if your hands react to prolonged contact with water. Note that some people have allergies to latex and nitrile gloves.
- Be alert to contaminants in the soil such as petrol. Keep a look out for asbestos, which may look deceptively like pottery.
When to do it
Finds washing should ideally be done during a dig or in the few days/weeks after the dig.
Finds left muddy in bags for too long can ‘sweat’ – if you aren’t able to wash finds for a while, ensure you have punched holes in the bags to allow the finds to ‘breathe’. Some finds will be more sensitive than others to being stored dirty: most post-Medieval pottery will survive fine if left for a while.
What not to wash
- Metalwork: Fe Iron, Cua Copper Alloy (green), PB Lead, Ag Silver.
- Friable pottery: leave this three days to dry out before washing (see instructions, later).
- Shale
- Glass if iridescent (shiny patina/coating)
- Charcoal – don’t collect this unless it appears in large concentrations in a feature, in which case it should be taken as an environmental sample, not as a find.
- Wood – is only interesting if it is from a waterlogged deposit, in which case it should be taken as an environmental sample.
Washing the finds
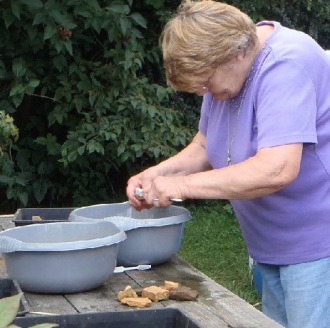
- Lay newspaper down (about 3 sheets thick) on a table. Fill two washing up bowls about two thirds full with water and place them next to each other on the newspaper. One will be your ‘dirty bowl’ to wash in and one will be your ‘rinsing bowl’. Change the water regularly.
- Line a finds tray with newspaper and place to the right of your bowls – this will be your drying tray.
- Select a bag of finds to wash, and put them in a second (unlined) finds tray. The bag/tray of finds should have a finds label listing the site code and context number. Rinse this to remove any mud, and place in the drying tray.
- Select your first find. Wash it carefully and thoroughly (see tips below on washing different artefact types). Don’t leave finds to soak in the bowl – this can dissolve friable pottery and metal and may lead to the contexts being mixed up. Rinse your find in the rinsing bowl and place in the lined finds tray.
- Continue in this vein until you run out of finds from this context/finds bag. If you have too many finds from this context for one finds tray, you MUST write another finds label for the overflow tray.
After Washing
- Leave finds to dry for about 5-6 days. If the finds still have any mud on them, you will need to rewash them before they go to a specialist.
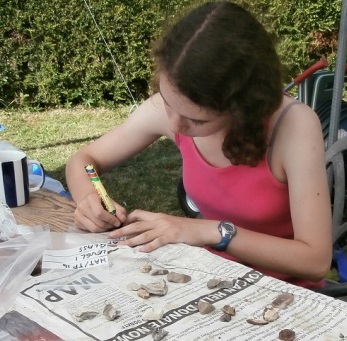
- Once thoroughly dry, sort and bag the finds from each context by find type (see below). Select appropriate sized bags to bag them separately.
- Exactly transpose the information on the label onto the finds bags using a permanent marker pen, including the site code ABCDEF15, context number (410), and artefact finds type. Punch 3 holes into the bag using a kebab skewer or similar. Place all the finds including the label into your bag. You may need to write more labels if you had several artefact types.
- These finds should then be identified by a finds specialist, and will form part of your archive.
Find Types (for labels)
- Pottery
- CBM – Ceramic Building Material (brick, tile etc.)
- Fired Clay – if ‘lumpy’ and not obviously brick or tile
- Daub
- Mortar/plaster
- Clay pipe
- Slag – looks lumpy and metallic
- Metal (unwashed)
- Animal Bone
- Shell – don’t keep snail shells unless from waterlogged deposits
- HSR – Human Skeletal Remains
- Worked Bone – if carvings, made into artefacts etc.
- Flint – only include worked flint
- Worked stone – e.g. if made into artefacts
- Burnt flint – white/grey, cracking, ‘crazy paving’
- Stone – if unnatural to area (e.g. slate)
Tips on washing different artefacts
Robust Pottery
Start with the flat surfaces and brush gently with a toothbrush, taking care if the surface has a slip or colour coat. Roman pottery such as Nene Valley ware and Samian have slips/surfaces that are easily destroyed: so take care not to scrub too hard. Now turn to the sides of the pottery sherd: these need to be thoroughly cleaned so that there is no longer any mud left on them and they are the same colour as the original fabric. This may take some time so be diligent: pottery specialists are most interested in the inclusions in the pottery so it is essential it is well cleaned.
Friable pottery
Friable pottery such as prehistoric pottery should be left for three days before attempting washing. You will find a sponge useful – and take time so the pottery doesn’t dissolve or fall apart. Cleaning with a toothbrush may leave toothbrush marks – if you spot these appearing, please revert to a sponge.
Animal Bone
You may find a kebab skewer useful for extracting mud from hollow bones and odd shapes. Ensure all the mud in the middle of the bone is removed, if possible.
Human Bone
Hopefully you shouldn’t be excavating any of this! If you have uncovered human remains, seek advice from professionals. Leave the bone to dry fully before washing. Wash small pieces of human bone in a sieve carefully so as not to lose any of the bone. Small pieces of human bone should be retained so as to show respect.
Metalwork
DO NOT WASH THIS. Rust and other corrosions are usually formed when air and water react with the metal – washing it only increases the decay of the metal. Instead, please follow guidelines in First Aid for Finds. As a basic guide, put metalwork in a stewart box with some silica gel to dry it out, and send rare finds to a professional conservator. Separate into different materials, i.e. Fe, Cua, Pb.
Glass
Do not wash glass if it is iridescent (has a shiny patina) or flaky; instead, brush it gently with a dry toothbrush. Seek advice from professionals as to dating. Take care not to cut yourself.
If in doubt, seek advice from professionals BEFORE washing
This step by step guide to archaeological techniques is one of a series prepared by Jigsaw – a network of Cambridgeshire groups working alongside Oxford Archaeology East. The guides are available for download from the Jigsaw Website. Copyright in these guides belongs to Jigsaw and the authors.

